Side Two
Side two of the trunk with its compartment and drawers is way more complex than the hanging style of side one. I started with a photo shoot like I did with one. There are several areas of concern with this side so extra shots were taken of those areas.
It is a bit difficult to write this section up in order because there is a lot happening that cross over to one and other. Photos below will hopefully help it come together.
 |
1. Side view-not finished but showing the internals of the trunks
|
 |
| 2. Front view |
The Top Compartment Area
First up there is a bracket at the base of the dome compartment that had broken away from the trunk during it's travels. Also the bracket which sat at the front had come out of alignment.
Both theses brackets line up the divide board between the three small drawers and the pull down compartment. They both need to be replaced as well as strengthened. I decided to replace the four brackets that hold the base board to this whole compartment as well.
I sensed there could be re-alignment issues in doing all of this, so for the first stage I set it all up as a simple 'mock up' run to start with.
After gutting the compartment I decided to add the 3mm ply that I did not use in side one.
I figured because there is no sliding rail to contend with, for added support the ply just might work on this side . A small block of timber was added to the base where the bracket is to be replaced. Also the 3mm board will be support for the bracket that goes on the front.
The dome bracket and the three metal small drawer rails were put back onto the divider board and side of the trunk. The brackets on the base board were also put in place.
There was a very bad split in on one side of the front timber trim that supported the pull down flap when closed. I glued and taped it and although it did work I was concerned that it will still be too weak to hold the leather strap that was to fit into it - I will review this later.
But for now the timber trim was taped into position for the testing of the section and the new board that I was going to use for the flap.
Both brackets and divide board were tested in the mock up and worked just fine.
Luckily I decided to put back the three drawers just to see how it was going to look. In doing this I found a large gap from the top edge. I pulled it all down re checked the drawer rails, put it all back again, still the same. I thought the base board was out of alignment, but it wasn't. I re-set it all again for the third time, and still the same.
This was starting to do my head in!.... I ended up going back into my original photos like I have done all the way through the makeover, only to find the I had places the rails upside down grrr! I guess the moral here is to always refer back to photos as you can't rely on memory alone, specially when there has been a time gap in-between working the job.
Again ALWAYS take before and during photos and lots of them.
 |
| Top compartment - very sad! |
 |
Compartment pulled down - no turning back now!
|
 |
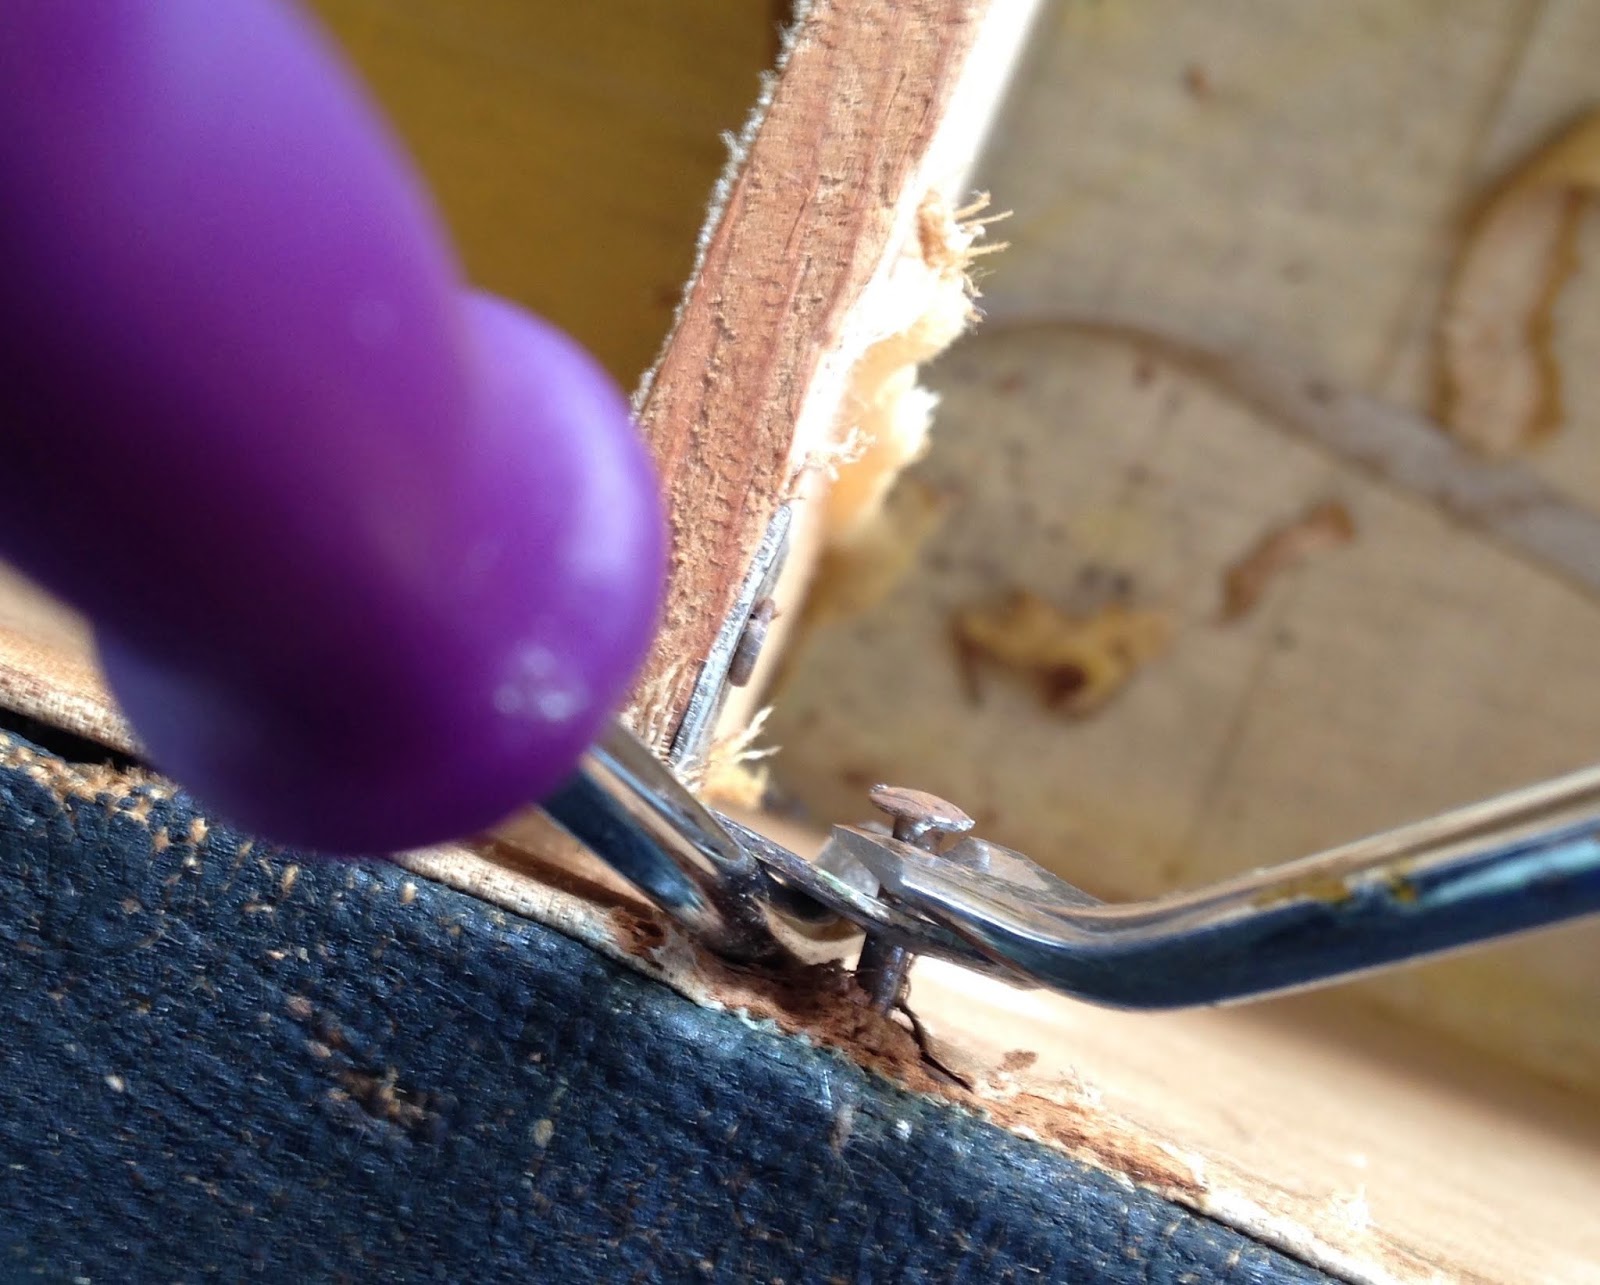
I could not believe the size and number of nails used
to hold this 5mm dividing board! |
 |
| Inside bracket broken away at the base of the dome |
Top bracket broken away from the front of the dome
 |
| New bracket added to the timber support at the base |
 |
New brackets added to one end of the base board
|
Once the mock up had been completed I pulled it all own, stripped all the lining, drilled out the remaining drawer rails and hingers from the pull down flap which were then cleaned and sprayed black. The trunk was then lined with paper and material like in side one once.
Once the trunk was lined with it's material I worked on the pull down flap. Again a piece of 3mm ply was used, this was lined the same as the drawers. Hingers were put aback on, I was worried that the Chicago screws would not fit side by side, but they did :-)
 |
| Pull down flap hinge 1 |
 |
| Pull down flap hinge 2 |
I could not use the original stud clips from the pull down flap, so I had to revert to magnetic clips instead. I did not have ant metal domes like that of the drawers, so I faked it by using dome shaped buttons, drilled them out and sprayed black. The metal rings would show on the second side of the flap so I disguised them by add ing two different size washers glued together and again sprayed black
 |
| Original stud clips |
 |
| Magnetic clips |
 |
| Back of the board with the fake look washers |
 |
| Repaired timber joint |
 |
Completed section
Fake buttons covering the magnetic clip fronts |
 |
| Chopsticks were a great help when lining up the drawer holes and rails |
 |
| Completed top compartment |


