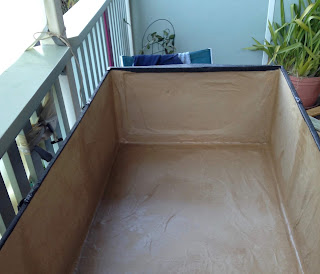
Re-lining the trunk
Cardboard was nailed at the base of the curved dome section on the top which needed to be replaced. I originally cut a sheet of 3mm ply and used it instead of cardboard to give it more strength. After nailing it in place I realised later that I had to take it out because the ply, being thicker than the original cardboard meant that when the slider tray was put back in, it would not line up properly with the holes from the slide of the trunk.
I had trouble finding thick cardboard the size I would need and I did not want to join two pieces together because it would leave a weakness to the section. I ended up gluing two pieces of art cardboard together then trimmed it to size and nailed it back in with the original tacks. I was a little concerned that this cardboard would not be as strong as the original!.
The original material on the trunk was a thin non fraying type which was glued in one layer all the way around the front edge of the trunk. Whereas, the Loincloth being thicker, did fray, so I added a sewn edge to it. The two front edges could have done without the sewn edge because they would have the wooden trim put back over them, but I still edged it, just in case.
After the paper lining I added a layer of padding to the bask section. I wanted to use something a but firmer to the fibre lining I was using for the drawer fronts. I ended up finding some thick felt from an ironing board cover, this worked perfectly.
After the paper lining I added a layer of padding to the bask section. I wanted to use something a but firmer to the fibre lining I was using for the drawer fronts. I ended up finding some thick felt from an ironing board cover, this worked perfectly.
 |
| Padded lining |
Next came the material lining of the trunk. I used a method demonstrated by
Matt from Antique trunks and chests where he starts from the top edge and works back into the trunk. |
| Material lining added |
When I originally lined the three small drawers, I tried a spray material adhesive but I found it not strong (probably good for light craft work) but not for this task, so I used PVA instead.
The PVA being stronger worked fine, However, when the material on the two side panels finally dried it left blotches from where it has soaked into the loincloth. Not happy!
Not having enough material to cover the sides again, I had to purchase more. It was now months since my original purchase of the material and even with material and name code when I returned home the material had a different dye lot tone. Double not happy!!
Anyway it can't be changed, I just had to use it. Now my trunk has a two toned look to the lining. Ah well, perhaps I should have bought more material in the original purchase, but how would you know... plus there is the expense to think about.
I always planed to have an edge across the bottom front of the base for two reasons:
A/ it will the edge more strength if things were to be placed at the base.
B/ I never liked the look of how the original material just laid across the front. I also decided to add a row of brass upholstery pins all the way around the base as well as a row down the centre of the trunk.


No comments:
Post a Comment