The Makeover Begins
March 2017 I was ready to start the makeover of my trunk and this is how I went about it:
Lining the drawers
I won't be starting the trunks body until I retire, so, I started working on the lining of the three small drawers. Many of the drawers had weak joints on their fronts. These were re-glued and taped down tight until dried.
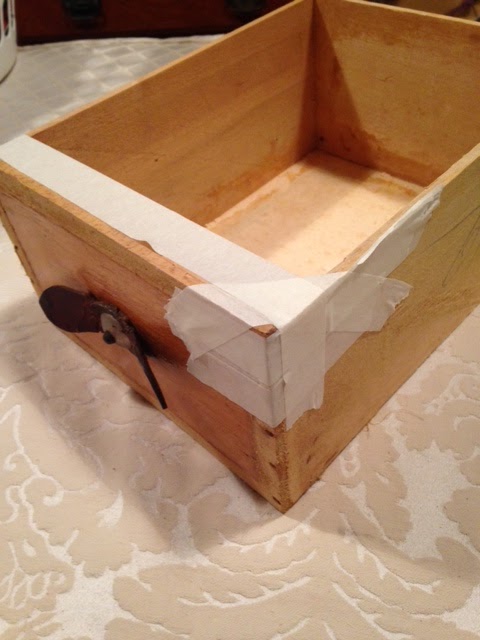 |
| Tapped joint |
 |
| Metal connector on a leather worn drawer puller |
Next I had a go at drilling the back of the nail out, but the steel was like the 'Titanic' and too hard for the drill bit. I remembered years ago that we had bought a special pair of (not sure of the correct name) but I guess 'cutters'. They have two pivots and once I could work the connector loose enough to get the head of the cutters in, with two squeezes ' snap' Got cha!
 |
| These cutters are going to be my next best friend |
I lined the drawers both inside and out with cardboard using Matt's method from Antique trunks and Chests. (Find Matt on Youtube) I learned a lot from watching the three videos that Matt presented. Thanks Matt.
 |
| Sanded drawer |
 |
| I never got around to taking a photo of the small drawers being lined with cardboard, but here is a larger one that was taken later |
I found Sage Reynolds YouTube video Lining a box with no joins. I liked Sage's technique, he was well informed and presented in a very nice manner. I did manage to complete a box using his method, although I had to alter one section to allow for the use of the different material on the front.
Note: I spent some time stopping Sage's video to take screen shots to print out of each step. Notes were taken and written up in my folder alongside the screen shots. I did this because I knew it would be some time before I would get to cover all three drawers and I didn't want to replay and stop the video 100 times.
I'm glad I did this process because the drawers weren't covered all in one hit and I re-visited my notes lots of times. Although the three smaller drawers are now covered I have decided to hold on completing the larger drawers. I want to move onto other areas of the trunks makeover. I know the drawer process worked for me and I will get to cover the remaining drawers later down the track with help from my trusty notes.
 |
| Sage's notes |
 |
| One of the three drawers completed, except for the brass connector |
No comments:
Post a Comment